Welcome to this tutorial where you will learn how to give a a painted look to clothing and such.
Step 1:
Get a picture with a white background background, like this one:
Step 2:
I chose to select every color of the clothing (I'm also going to select head and hair) in separate layers, which makes it easier to edit later and gives a better result. The selection process can easily be done with either the pen tool (see this tutorial) or the polygonal lasso tool (zoom in until you see pixels). Once you've selected everything in seperate layers go to step 3.
Step 3:
Choose the first layer you want to edit, I decided to take the yellow one. Now go to Filter→Blur→Blur more so the effect looks better. After that use Filter→Brush strokes→Crosshatch. I used: Stroke length: 9, Sharpness: 6 and Strength: 1. After you've done that it should look like this:
It doesn't realy show when you do just one layer
Now apply this to every colored layer, but not her head or hair. It should look more like what we want now, this is what it's supposed to look like:
Step 4:
Now there's probably something bothering you, why did we not just apply the same trick to the face? Simply because it doesn't turn out right. When you apply the same filters to the face layer you would get this:
And making this girl the joker is a sin! (I used crosshatch twice to make her scarier.. Why so serious?)
So instead select her face, and apply these filters on her: Filter→Blur→Blur more and Filter→Arstisctic→Dry brush (Brush size: 2, Brush detail: 8 and texture: 1)
Use the eraser to tool to delete her eyes on the layer, and you've got you're done with adding the painted effect (don't forget to show the lowest layer to). Here's my outcome:
Halftone effect
Now I'll show you how to create a halftone effect, I'll use the same picture since it's easier.
I'll simply make a new layer, apply my image and use
I'll simply make a new layer, apply my image and use
Filter→Pixlate→Color halftone.
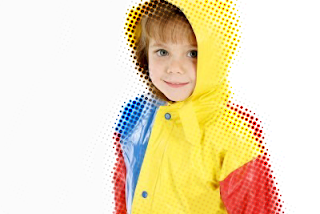
There are quite some settings you can change, but I'm not really planning to explain them. Since I don't have a very high quality image, I'll set the Max. Radius to 4 and to keep it simple and get a nice effect I'm going to put all the channels to 25. What you've got now is probably not realy looking good.. Here's what happend with me:
Obviously this isn't what I want it to look like, so I deleted all the white parts and the middle of the girl, and now it looks like this:

Hope you enjoyed these tutorials and please comment with your outcomes if you like them!
~The Just photoshopping team.


No comments:
Post a Comment