In this post I will explain all the filters that go under 'Artistic'. I will use photo's to show what the filter can do. Most filters wont looks so good, but with the right blending mode, or the right combination of filters could make the most beautiful outcomes.
Lets start off with Colored Pencil.
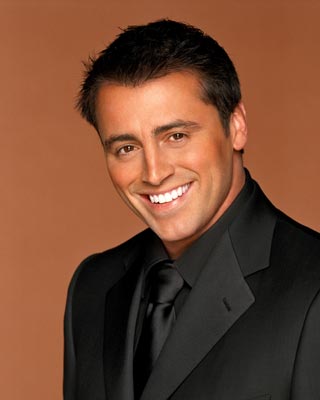
Before:

Now I used this settings to give it a more artistic look. I don't like it, but as I said before, the right combination or the right blending mode might help.
Pencil Width (This decides how big the strokes are going to be if I'm correct) : 2
Stroke Pressure (This decides how much pressure the strokes will get) : 15
Paper Brightness (This decides the brightness of the picture) : 10

Moving on to the next filter, Cutout. I like the way that this filter works, because it gives a great artistic look :)
Before:

The settings I used:
Number of Levels (This decides how many different colors you will get) : 4
Edge Simplicity (This decides how detailed the edges will get) : 3
Edge Fidelity: 3
Outcome:

I like the outcome of Cutout, its simple, but nice.
Moving on to the next filter, Dry Brush.
Before:

The Settings I used:
Brush Size (How big the brush strokes will be) : 9
Brush Detail (This decides how much detail there will come) : 10
Texture (This decides how much texture there will be in the picture) : 2

I actually don't like it. It might look good with a Smart Blur, but lets keep it like this for now.
Next filter: Film Grain.
Before:
Settings:
Grain (This decides how much 'grain' there will be) : 1
Highlight Area (This slider decides how strong the highlights will be shown) : 7
Intensity (How strong the other two are going to be shown) : 1

I like the Intensity and Highlight sliders, but the Grain ruins it for me. You could put it off, but just to give you guys the right idea, I kept it on.
Next filter we are going to test : Fresco.
Before:

Settings I used:
Brush Size (This decides how big the brush strokes will get) : 3
Brush Detail (How much detail the brush will have) : 10
Texture (How much texture there will be in the outcome) : 1

This filter looks pretty nice to me, but it screws with the head, and other detailed things like that.
Next filter we will be testing: Neon Glow.
I know this filter already because I use it in almost every piece of art I have ever made.
Before:

Glow Size (This decides how much the glow will be spread) (If you go under 0, you will get Inverted outcomes.) : 0
Glow Brightness ( This decides how bright your picture will get) : 17
Glow Color : #ddd73b

Next filter is: Paint Doubs.
Before:

The settings I used:
Brush Size (This decides how big the strokes of the brush will be) : 5
Sharpness (How much your image will get sharpened) : 2
Brush type set to Simple.

This filter could totally ruin a picture, but in the right hands it's a great filter.
Next filter..
Palette Knife
Before:

The settings I used:
Stroke Size (This decides how big the strokes of the brush will be) : 17
Stroke Detail (How much detail the brush will have) : 3
Softness ( How soft the sides will get, but this doesn't work. I just put 5, because it could work at your computer) : 5

I really like this filter, great for artistic meanings.
Next filter: Plastic Wrap :)
This is a great filter for things that you wouldn't think of. But I'm just going to show you how it looks.
Before:

The settings I used:
Highlight Strength (How strong the highlights will be shown) : 4
Detail (How much detail it will get) : 5
Smoothness (How smooth the wrap will get) : 15
This filter doesn't looks so good on its own.

Now the next filter: Poster Edges.
Before:

Settings:
Edge Thickness (How thick the lines will be) : 5
Edge Intensity (How intense the lines will be) : 0
Posterization : 2

This is a great filter, but the only thing missing is Smoothen Edges.
Next: Rough Pastels
Before:

The settings:
Stroke Length (The length of the strokes) : 24
Stroke Detail (The detail of the strokes) : 2
Texture (The texture) : Sandstone
Scaling The Scale XD ) : 145%
Relief (How strong the effect will be shown) : 11
Light (Where the light comes from) : Bottom

Moving on to the next filter, Smudge Stick.
Before:

Settings:
Stroke Length (The length of the strokes) : 4
Highlight Area (This slider decides how strong the highlights will be shown) : 2
Intensity (How strong the two above will be shown) : 2

This one could be great for rain on the background etc.etc.
Next filter, Under Painting.
Before:

The Settings I used:
Brush Size (How big the brush strokes will be) : 1
Texture Coverage (How much the texture will cover) : 7
Texture (What kind of texture) : Sandstone
Scaling: 55%
Relief: 1
Light: Right

The last filter.. Water Color :)
Before:

The Settings I used:
Brush Detail (The brush detail) : 14
Shadow Intensity (The strength of the shadows) : 1
Texture (How much texture will be added) : 1

Wait.. I've just run out of filters :O
I hope you enjoyed this post, now go do something with it, try your own things!
Highlight Area (This slider decides how strong the highlights will be shown) : 2
Intensity (How strong the two above will be shown) : 2

This one could be great for rain on the background etc.etc.
Next filter, Under Painting.
Before:
The Settings I used:
Brush Size (How big the brush strokes will be) : 1
Texture Coverage (How much the texture will cover) : 7
Texture (What kind of texture) : Sandstone
Scaling: 55%
Relief: 1
Light: Right

The last filter.. Water Color :)
Before:
The Settings I used:
Brush Detail (The brush detail) : 14
Shadow Intensity (The strength of the shadows) : 1
Texture (How much texture will be added) : 1
Wait.. I've just run out of filters :O
I hope you enjoyed this post, now go do something with it, try your own things!