Sunday, February 28, 2010

Photoshop Tutorial - Neon light text

We will be making something like this:

Step 1:
Make a new file, and just try some sizes, because your text has to fit in. I used 400 x 170 .
Fill the background with black, and then type your text in white.

Step 2:
Duplicate the text layer, and go to Filter>>Blur>>Gaussian Blur. Set it to 4,2 px.

Step 3:
Now go to Blending Options on the blurred layer. Do the same as the pictures.

Outer Glow

Inner Glow


Gradient Overlay

Now your text looks like this:
But we want more glow! Duplicate the orignal text layer, wich will make the text a bit lighter.
Now make a new layer, and go to Image>>Apply Image . Now put that layer to Screen, Color Dodge or Linear Dodge. Take the one that fits the best.

And you are done! Congratz!

~Applejuice

Friday, February 12, 2010

Photoshop Tutorial - Price Tag

Well, I have been to the store, and I saw the most ugly price tag. So, I thought, why not post a tutorial to make a more beatiful one?


Step one:
Grab the Custom Shape tool.
Do as the following picture does.

Now press the little arrow. Search for "Banners". If you have done that, you should look trough the pictures you have gotten now. There should be a picture that looks like the one on the final image. But its Black and White. Now set your foreground color to gray.

Open your document, size doesn't actually matter. Pres shift, and keep it pressed in until I say you may stop to do so.
Hold your mouse from one corner to the other one(While clicking xD).. Or in the middle or something. You choose, just make sure it looks good .
*Let Shift go .

Step two:
Now go to Blending Options, and add a Drop Shadow.

Now a Gradient Overlay.
A Stroke..
*Note: I'm not going to name any color. You should take the color that looks good for you.

Step three:
Take out your gradient tool, select the gradient that goes from white to transparent. Take the selection from your tag by Ctrl + Clicking on the picture you see on the Layers pallet. Then you should drag the selection up. After that, add the gradient.

Now add your text, and done!

So sorry for the low quality pictures.

Wednesday, February 10, 2010

Advanced Photoshop Tutorial - Apple Wallpaper

Step 1:
Learn in this tutorial how to create an Wallpaper based on Apple...
Start working by creating a new file (
File>New) with 1280×1024 px and 300 dpi.

Step two:
Now we are going to add a Gradient Overlay, by right clicking the mouse on the layer, then go to Blending Options. Now click on Gradient overlay, and change it to this:

Step three:
This is the hardest. Take out your pen tool, and draw the form of an Apple with a circle next to it.Press Alt button while using the Ellipse Tool (U) to cut out a part of the apple, from its right side, the same way shown below: Learn how to use the pentool here: http://www.melissaclifton.com/tutorial-pentool.html


Step four:
Blending Options>Inner Shadow


Blending Options>Inner Glow

Blending Options>Gradient Overlay

Now then, a gradient..meters:


Blending Options>Stroke


Now, it looks like this:


Step five:
Take out your Pen Tool again, now we're going to add the leaf on top of the Apple.

Blending Options>Gradient Overlay

Gradient

Blending Options>Stroke


And BAM! You got it already really far.

Step six:
Makin' an highlight now. Grab your Pen Tool again.

Blending Options>Gradient Overlay (Fill 0%)
Gradient

Step seven:
Highligh time!! Now for the Apple :D

Blending Options > Gradient Overlay (Fill 0%)

Gradient

Omg Omg! You got this awesome Apple now!

Step eight:
You can add a little mark or something on the Apple, not going to explain any of that though.
We are going to Add a reflection, and you will just have to follow this tutorial, 'cause I'm getting sleepy..


Well, there ya are! Maybe wanna add a white brush of 65 px (20% Opacity) though.. But thats ur choice.

Friday, February 5, 2010

Photoshop tutorial - Rainbow text

In this tutorial I will teach you how to make a picture like this one.


Well then , lets begin.

Step one:
Open a new document with the size of 500 x 500 px. Now jsut fill it with black.


Step two:
Now just place your text in the middle. I would prefer white text.
Now rasterize the layer (Right click layer and then click rasterize).

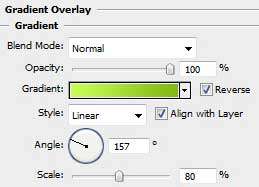
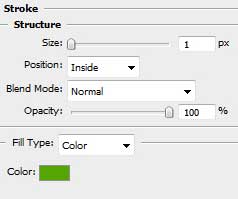
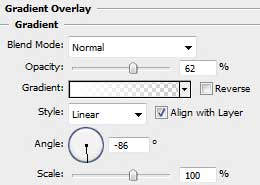
Now press Ctrl + J . Now you will right click the layer and click on blending options. Now add a color overlay, set to #800cb6.
Now it will look like this:
I think you cant see it on this picture, but you will see a little white line around the letter.
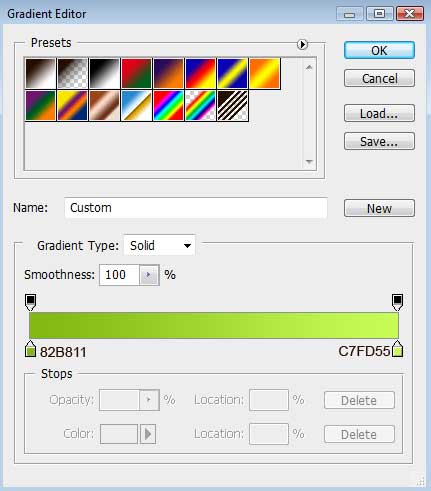
When you have done all the letters with these colors: #074d9d, #0496b7, #00992b,#8c9f09, #a55405 and #9f0929 (If you use more letters, just start over with the colors.) then you should just take the white layer out of the view.

Step 3:
First merge all the layers, (Select them all, right mouse click, merge) then we will continue.

Now press Ctrl + J , and then go to Filter>>Blur>>Motion Blur , angle 90, distance 100.
Now you have something like this:

Step 4:
Select the layer with the letters, and go tot Select>>Load>>Selection. Now you have the selection off the letters. Now get the Rectangular Marquee Tool. Hold alt, and select the lower part. If you did it right, it should disappear from the selection. This is how it should look:
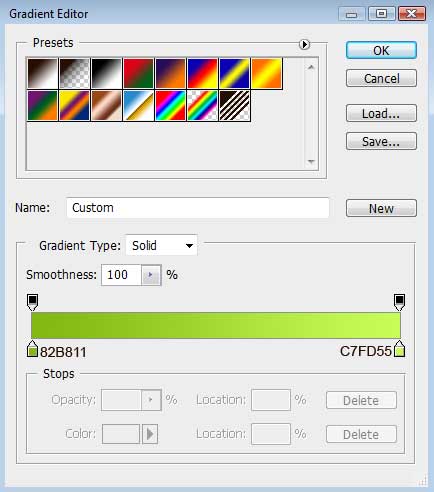
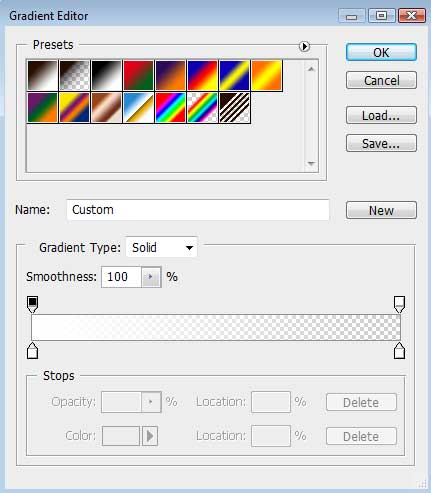
Now take out your gradient tool, (Right click the fill tool) and choose the gradient that goes from white to transparent. Now fill the area with it, so you get a nice effect.

Step five:
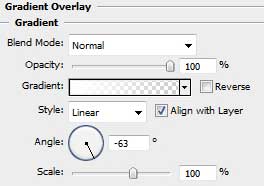
Everything from now is optional. I placed some text under it, and then added a gradient fill with the letter colors. Make sure that the text underneath matches the text above.


Step six:
Now take the colored text again, and duplicate it. Go to Filter>>Blur>>Motion Blur. Angle 0 , distance ### . It should be as long as your text.


This is it, congratz with your awesome text!!!