Click the picture to see full size.
Step 1:
Make a new file, size doesn't matter. Type in Google, using Garamond or Catull. Every letter should be on a separated layer. Color doesnt matter either. But gray - black is the best.
Step 2:
Go to the Layer pallete, and double click the letter G (Or right mouse click >> Blending Options).
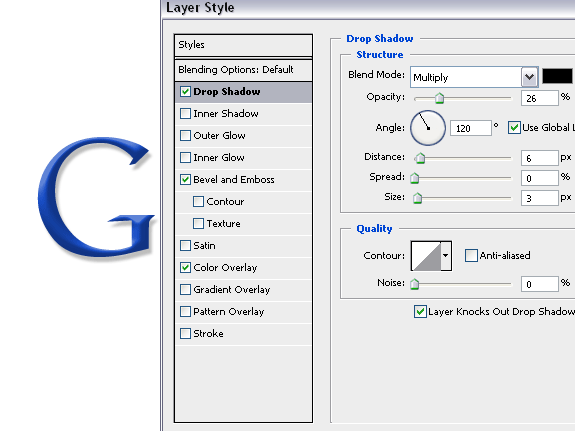
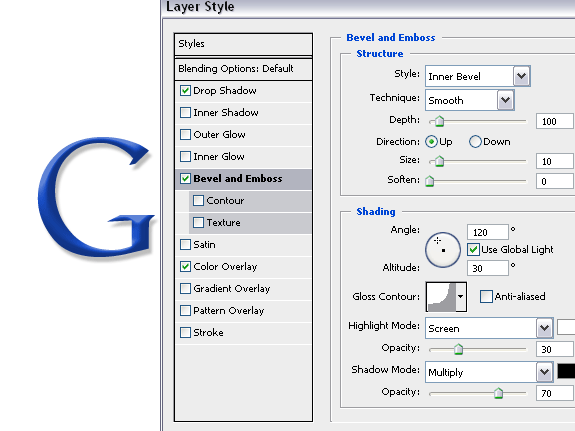
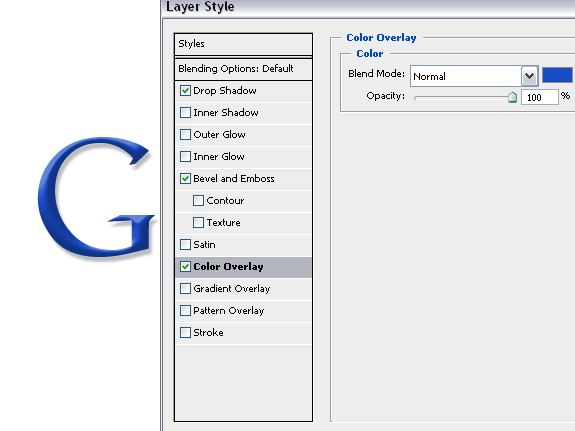
Set it to these settings:
Drop Shadow
Bevel And Emboss
Color Overlay
Use #184dc5 for the blue color.
Press ok.
Step 4:
Right click on the G layer, press Copy Layer style and right click the O layer, then paste it. Double click on the “o” layer and change the color.
Red – #de1b00
Step 5:
Repeat step 4 on the other letters, and change the colors to this:
Yellow – #ffcf00
Green – #32a93b
Green – #32a93b
There ya are :D


